
How to Set Up Meta Ads Manager and Pixel Tracking: A Step-by-Step Guide
Meta significantly overhauled how Pixel and Conversions API setup works in April 2026, and separately changed default attribution windows in January 2026 — two updates that mean older setup guides can genuinely misrepresent both what to click and what your reported numbers will look like.
Meta Ads Manager and Pixel tracking work together to help businesses create, manage, measure, and optimize advertising campaigns. Meta Ads Manager provides the tools to create and manage campaigns, while Meta Pixel tracking helps businesses understand actions visitors take after interacting with an ad. A properly configured setup can provide better visibility into website activity, conversions, and campaign performance, making it easier to optimize advertising decisions.
Meta Ads Manager and Pixel Tracking: What’s Changed in 2026
Pixel is becoming a “dataset.” Meta is gradually merging website, app, and offline event data into a single unified pipeline it now calls a dataset. If you set up your Pixel before this transition, your existing Pixel ID still works — it simply now displays as a Dataset ID in Events Manager. Older documentation that says “Pixel ID” and current screens that say “Dataset ID” are referring to the same identifier.
One-click Conversions API setup now exists. As of April 15, 2026, Meta added a genuinely no-code option: from Events Manager, your Pixel’s Overview tab now shows an Activate Conversions API button. Clicking it stands up server-side tracking automatically, with Meta hosting the infrastructure and inheriting your existing browser Pixel’s event configuration, including deduplication. This removes what used to be the biggest technical barrier to a proper CAPI setup for smaller businesses. It has real limits, though: one-click CAPI covers standard web events only — no offline conversions, no custom parameters beyond standard fields, no advanced deduplication logic. If your business needs any of that, you still need a partner integration or manual developer setup.
Attribution windows changed on January 12, 2026. Meta retired the old 7-day-view and 28-day-view attribution options. If your account still had those set and you didn’t adjust anything, reported conversions likely dropped 15–40% overnight — not because performance actually declined, but because Meta stopped counting the same way. If your numbers took an unexplained hit around that date, this is almost certainly why.
Browser tracking keeps getting more restricted. iOS and Safari’s Advanced Fingerprinting Protection, enabled by default since late 2025, strips click identifiers from traffic arriving through Mail and Messages links. Realistically, for EU traffic in particular, Pixel alone may only capture a genuine signal from something like 40–60% of actual visits — which is exactly why Meta has been pushing Conversions API as a standard part of every account, not an advanced add-on.
Before You Start
You’ll need a Meta Business Manager account (business.facebook.com), admin access to your website, and — if you’re on Shopify — access to your store’s sales channel settings, since Shopify has its own data-sharing configuration that interacts with Pixel setup.
Step 1: Set Up Meta Business Manager
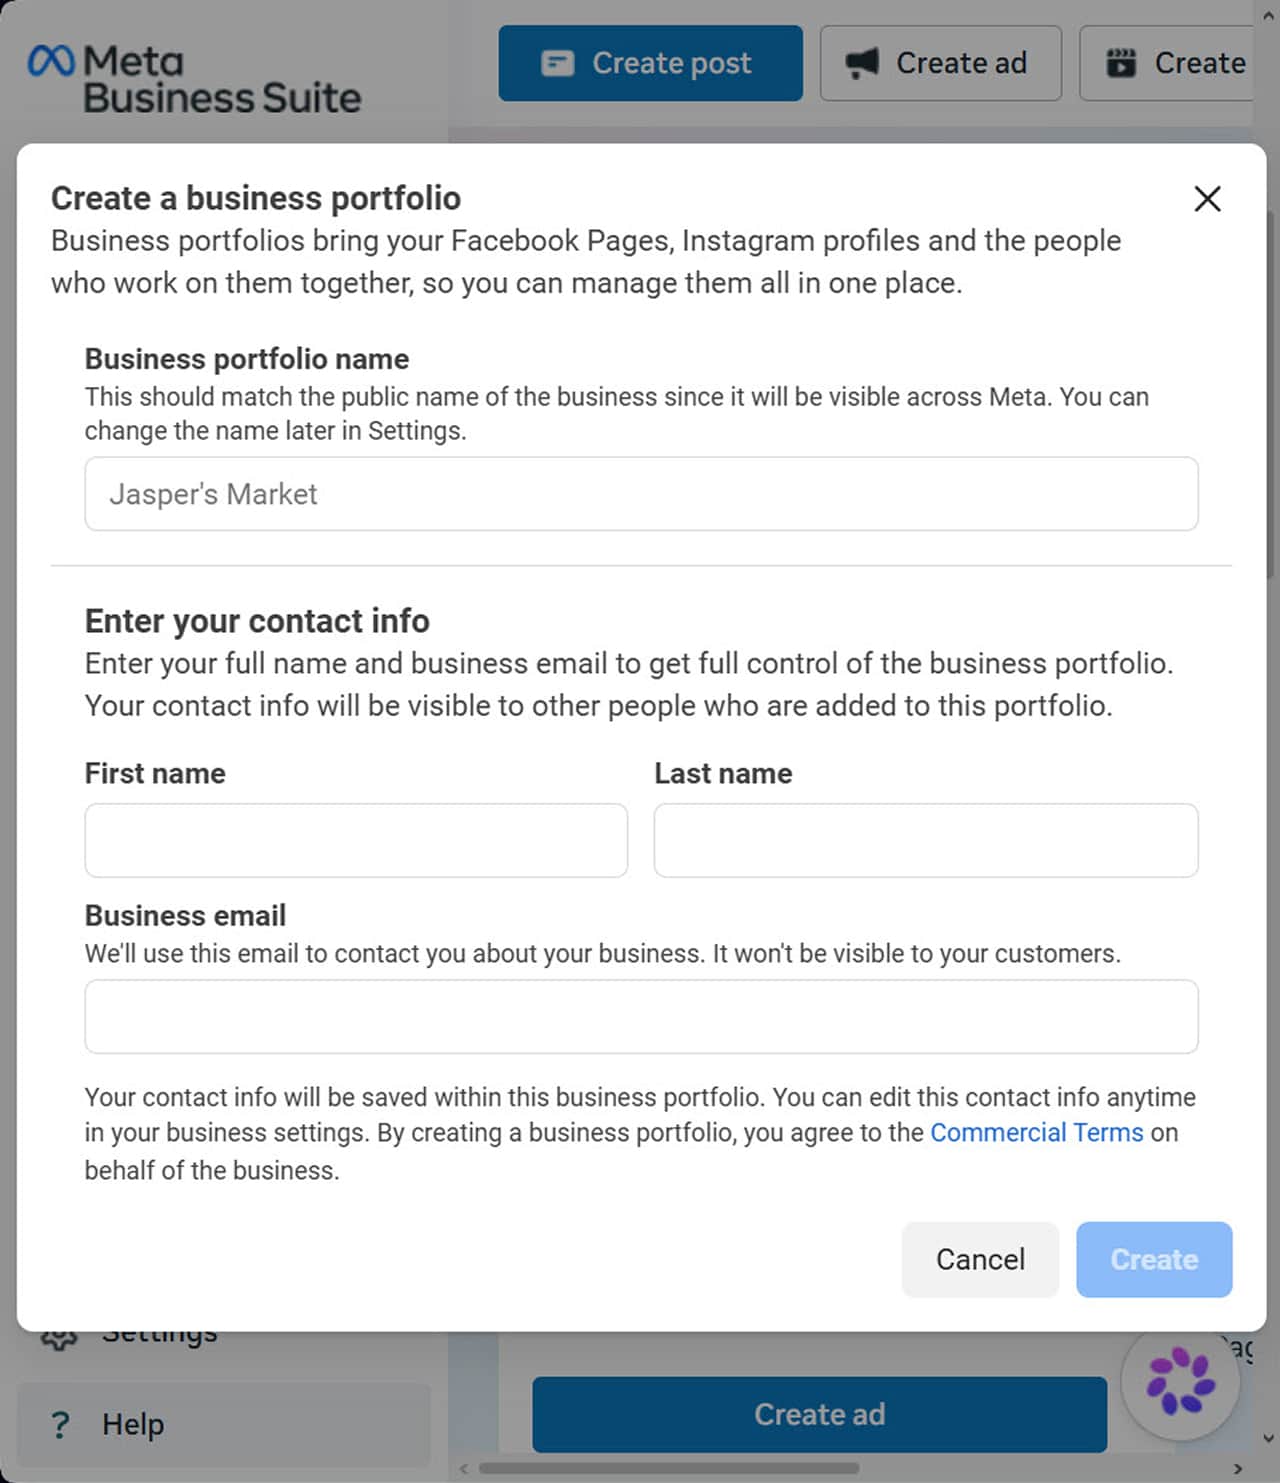
If you don’t already have one, create a Business Manager account at business.facebook.com and add your business details. This becomes the umbrella account for your ad accounts, Pixel/dataset, pages, and any team members or partners you grant access to.
Step 2: Create Your Pixel (Dataset)
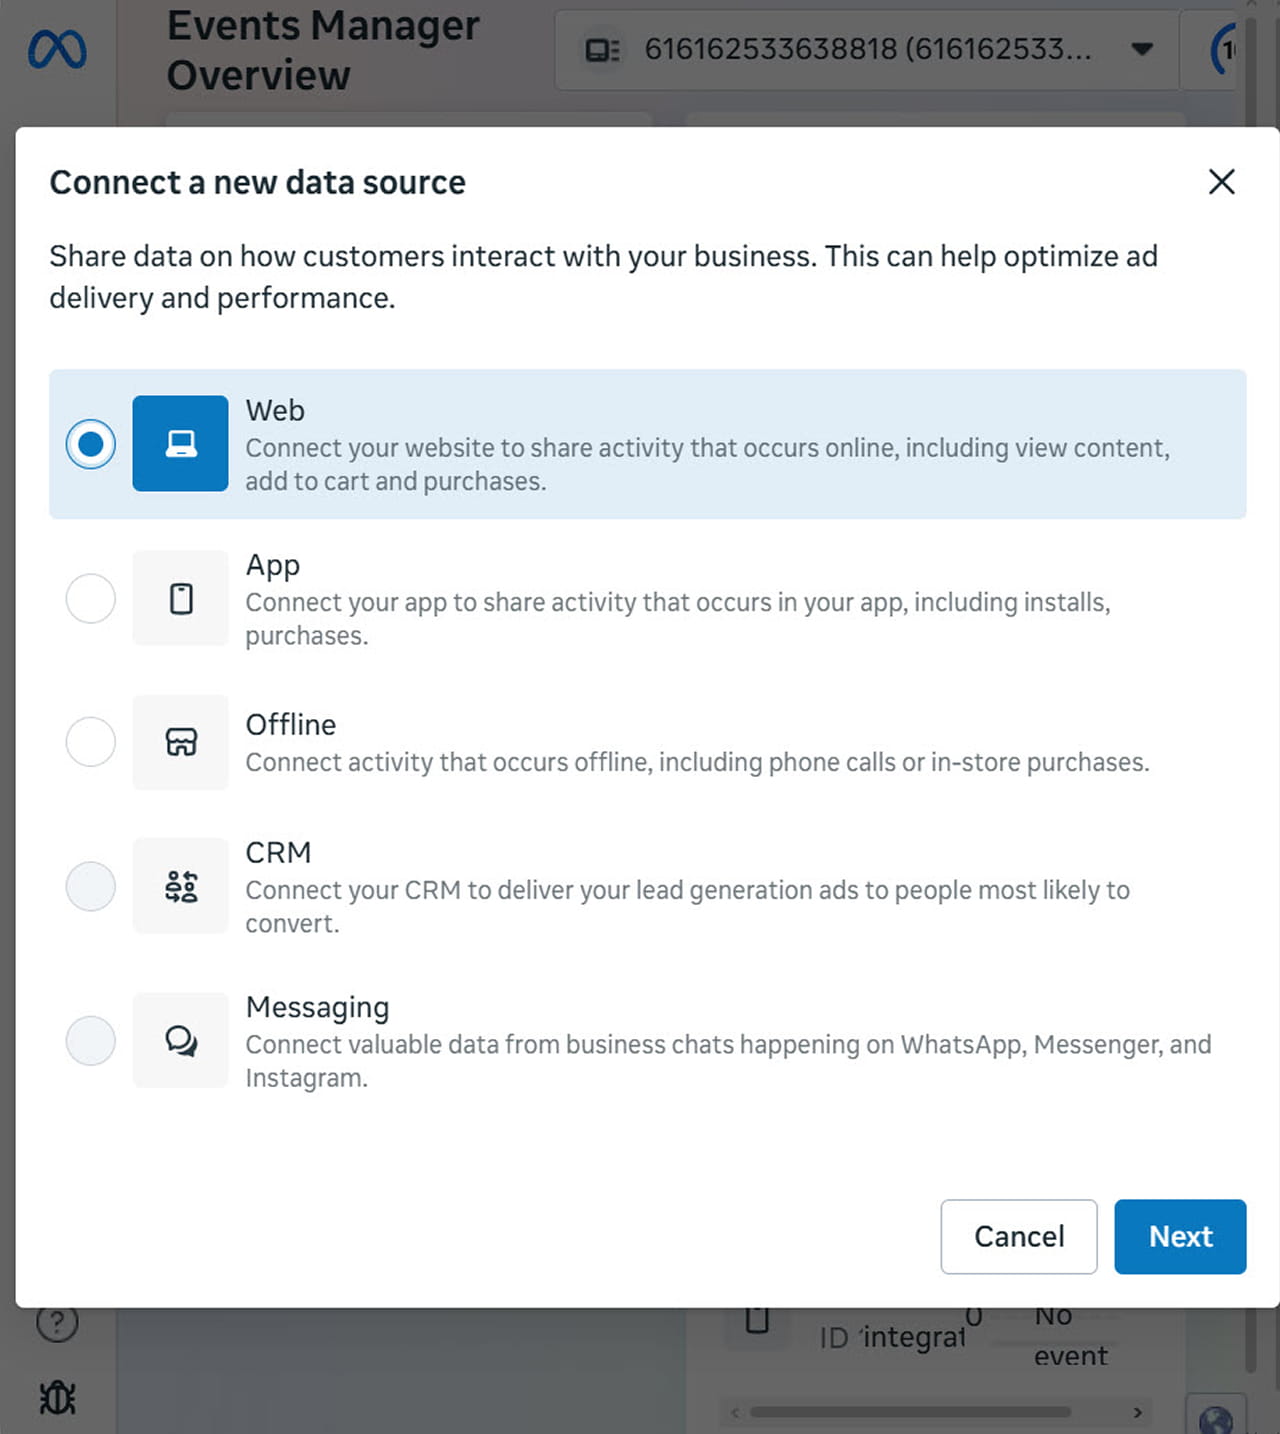
In Events Manager, click Connect Data, select Web, and continue. Name your pixel and create it — Meta will show you the ID (labeled Pixel ID or Dataset ID depending on when your account was set up; they’re the same thing). Record this ID, since you’ll need it for both the browser Pixel installation and, separately, for Conversions API if you set that up manually rather than using the one-click option.
Step 3: Install the Browser Pixel
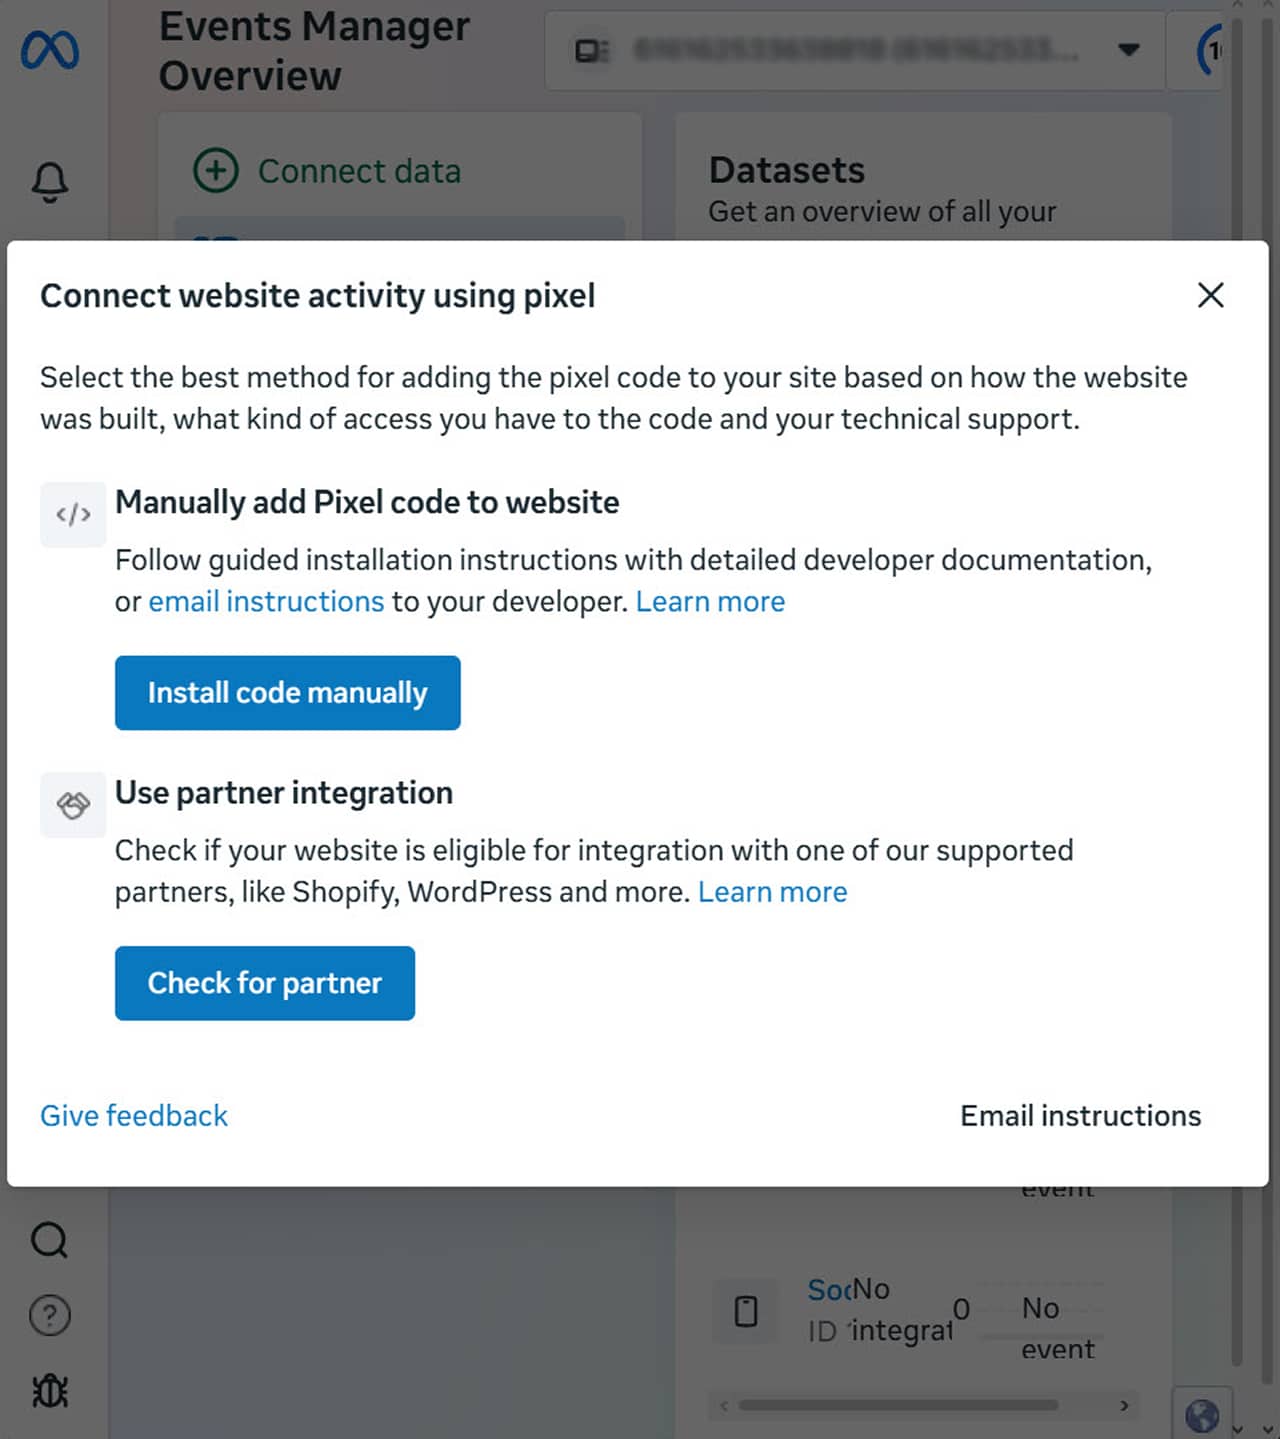
Meta offers a few installation paths depending on your platform: a partner integration (Shopify, WordPress, and most major platforms have one), Google Tag Manager, or manual code installation by pasting the Pixel base code into your site’s header. For most small and mid-sized businesses, a partner integration or GTM is easier to maintain than manual code, since it doesn’t require a developer for every future event you want to add.
Step 4: Activate Conversions API
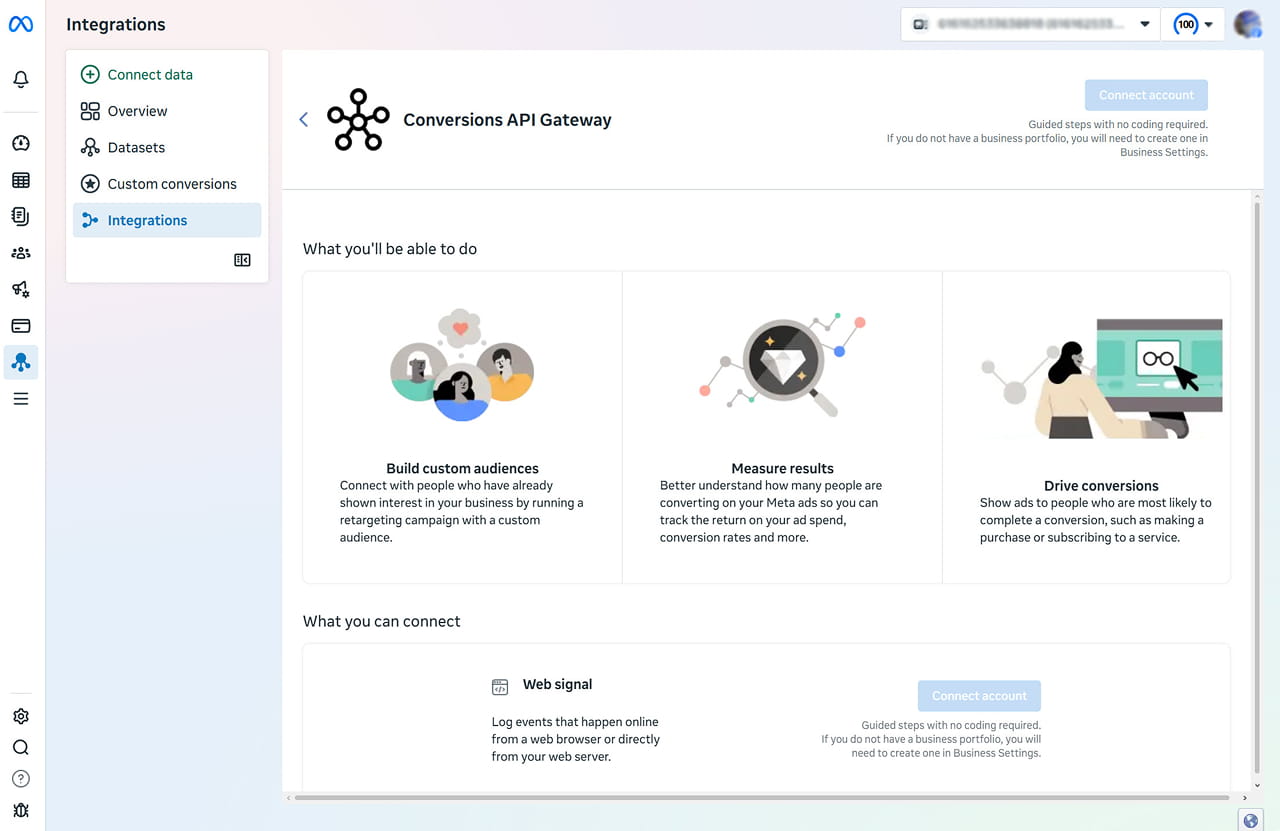
From your Pixel’s Overview tab in Events Manager, look for the Activate Conversions API button — this is the one-click option introduced in April 2026. If your needs are limited to standard events (page views, purchases, leads, add-to-cart), this is the simplest path and requires no code or ongoing maintenance on your end. If you need offline conversion tracking, custom parameters, or advanced deduplication, you’ll need a partner integration or manual developer setup instead — Meta’s own documentation for this is available through Events Manager’s Manage Integrations section.
Running both Pixel and Conversions API together, rather than Pixel alone, is associated with meaningfully lower cost per result according to Meta’s own reporting — a reasonable default to aim for regardless of business size now that the setup barrier has dropped.
Step 5: Configure Standard Events
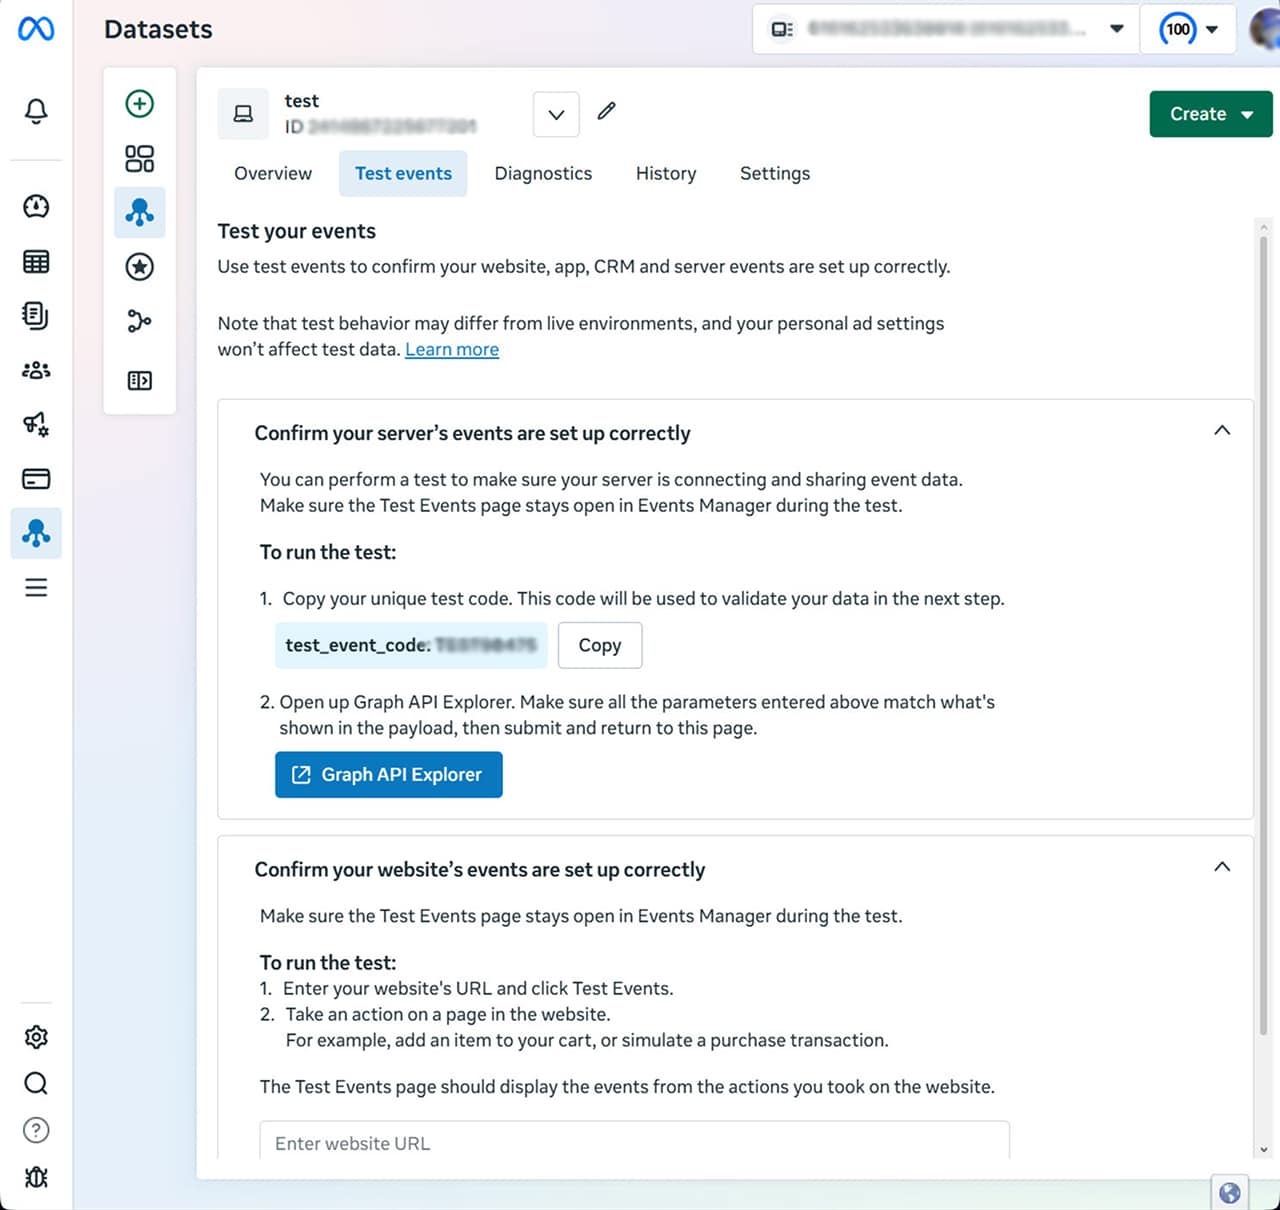
Under Events Manager, set up the standard events relevant to your business — Purchase, Lead, AddToCart, CompleteRegistration, and so on — and confirm each is firing correctly using the Test Events tool before relying on the data. If you’re using the AI-enhanced Pixel feature Meta rolled out in April 2026, it will automatically enrich these events with additional product and page details where available, which can improve targeting and reporting without extra manual configuration — but it’s worth reviewing what’s being sent rather than assuming enrichment is always desirable for every business type.
Step 6: Check Your Event Match Quality Score
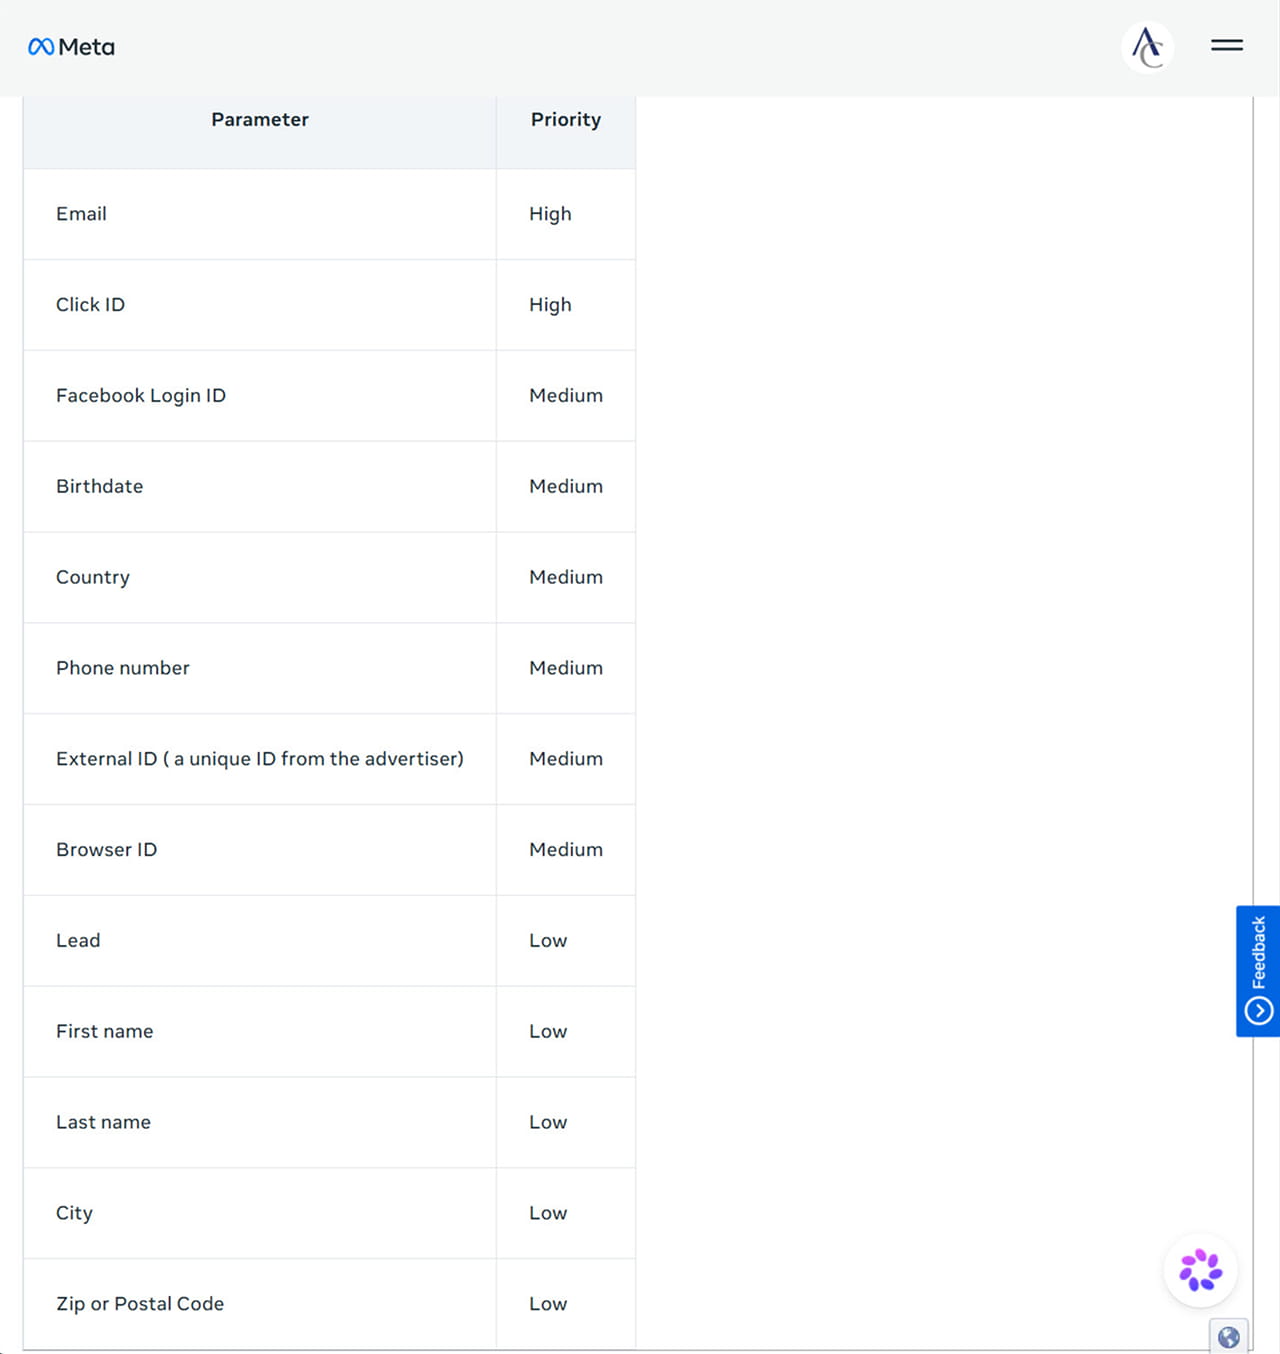
In Events Manager, each event shows an Event Match Quality (EMQ) score out of 10 — a measure of how much reliable customer information (email, phone, and similar) is being matched to each event. Aim for 8.8 or above on purchase events specifically; a lower score means Meta has less to work with for targeting and optimization, regardless of how correctly your Pixel and CAPI are technically installed.
Step 7: If You’re on Shopify, Check Your Data Sharing Setting
Shopify changed its default app-pixel data-sharing setting from “Always on” to “Optimized” in January 2026. If your store’s Meta sales channel data sharing was quietly switched, Pixels sending fewer events may now carry less weight in Meta’s ad optimization even though data is technically still reaching Meta. Check Meta & Facebook Sales Channel > Settings > Data Sharing in Shopify Admin and set it to Maximum if you want full event data flowing through.
Step 8: Review Consent Requirements for Your Audience
Conversions API doesn’t automatically make your tracking GDPR-compliant — it still requires genuine visitor consent, data minimization, and proper handling of personal information before firing, particularly for EU traffic. If you serve European visitors, confirm your consent banner is correctly gating both Pixel and CAPI events, not just the browser-side Pixel.
Common Mistakes to Avoid
A few issues show up repeatedly in current Meta setups: assuming a Pixel ID and a Dataset ID are different things and re-creating tracking that already exists, not noticing the January 2026 attribution window change and misreading a reporting drop as an actual performance problem, activating one-click CAPI without realizing its limitations for offline or custom events, and — on Shopify specifically — not checking whether the default data-sharing setting changed underneath an existing setup.
Final Thoughts
Meta has clearly been working to remove the technical barrier around proper conversion tracking, and the one-click CAPI option genuinely makes a meaningful difference for smaller businesses that previously skipped server-side tracking entirely. But 2026’s changes also mean a setup that was correct a year ago may be reporting inaccurately today without anything looking obviously broken. Checking attribution settings, EMQ scores, and platform-specific data-sharing defaults is now a standard part of keeping Meta tracking reliable, not a one-time setup task.
If you’d like this configured correctly for your business, Adroitte’s digital marketing services team can handle your full Meta Pixel and Conversions API setup.
Ready to Strengthen Your Local Visibility on Google?
A well-optimised Google Business Profile can help your business appear more prominently in local searches, build customer trust, and generate more opportunities from nearby customers.
Reach out through our contact form and we’ll get back to you promptly. Let’s optimise your Google Business Profile and build a local SEO strategy that improves your visibility, engagement, and long-term presence in local search.


 +91 8277203000
